Chemex Coffee — Clean, Balanced Pour-Over (House Method)
Yes breakfast begins with coffee - and if you love the Chemex - then you are old fashioned, liked Chem Lab - and probably use fountain pens. There are other ways to make coffee - but if you have a Chemix, this is how you want to make it.
Chemex Coffee — Clean, Balanced Pour-Over (House Method)
Our dependable house method: precise ratio, gentle pouring, and a quick drawdown for clarity. Use filtered water, weigh both coffee and water, and tune grind for taste.
 Clean, sweet cup: rinse filter, bloom well, pour in calm pulses.
Jump to: Ingredients & Gear · Method · Ratio Cheats · Troubleshooting · Notes
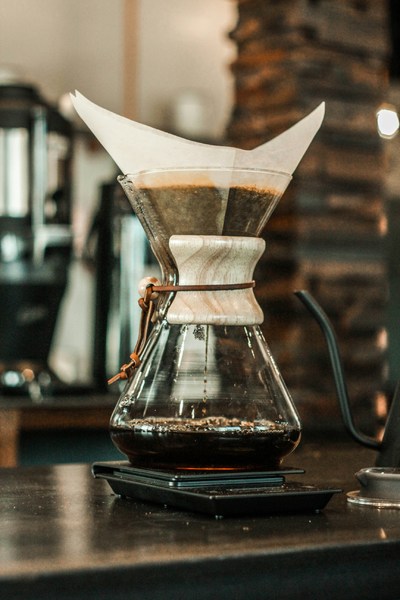
Ingredients & Gear
- Coffee: 36 g (medium-coarse grind)
- Water: 600 g at ~200°F / 93°C (just off boil)
- Gear: Chemex 6-cup + bonded filter, burr grinder, gooseneck kettle, scale, timer
If your tap water is very hard or very soft, try filtered or spring water for better extraction.
Method — Step by Step
- Rinse & preheat: Place the filter with the thick, 3-ply side at the spout. Rinse thoroughly and discard the rinse water.
- Grind: Medium-coarse—between table and kosher salt.
- Bloom (0:00–0:45): Add grounds, pour ~70 g to saturate, swirl gently. Wait 30–45 seconds.
- Main pours:Pour in calm circles, avoiding the walls:
- 0:45 → to 300 g by ~1:15
- 1:15 → to 480 g by ~2:15
- 2:15 → to 600 g by ~2:45–3:00
- Drawdown & serve: Let it drain. Aim to finish at 3:30–4:00. Swirl and serve.
 Medium-coarse grind: between table and kosher salt.
  Bloom for 30–45 seconds to de-gas and prep extraction.
Ratio Cheat Sheet
| Yield | Water (g) | Coffee (g) @1:16 | Coffee (g) @1:17 |
|---|---|---|---|
| 1 mug (~300 g) | 300 | 19 | 18 |
| 2 mugs (~600 g) | 600 | 38 | 35 |
| 3 mugs (~900 g) | 900 | 56 | 53 |
Start 1:16 for a fuller cup; 1:17 for lighter. Keep total brew time in range by adjusting grind.
Troubleshooting
- Sour / under-extracted: Grind slightly finer, extend brew to 3:45–4:00, or raise dose a touch.
- Bitter / over-extracted: Grind slightly coarser, keep total time ~3:20–3:40, or reduce dose slightly.
- Stalled drawdown: Grind is too fine or filter sealed to the wall—lift the cone slightly and keep pours centered.
 Filter orientation: the thick, 3-ply side faces the spout to prevent vacuum.
Notes
- Water: Bring to a full boil then wait ~30 seconds for ~200°F / 93°C.
- Swirl: A gentle swirl at the end evens extraction and clarifies the cup.
- Decaf: Use the exact same method and ratios.